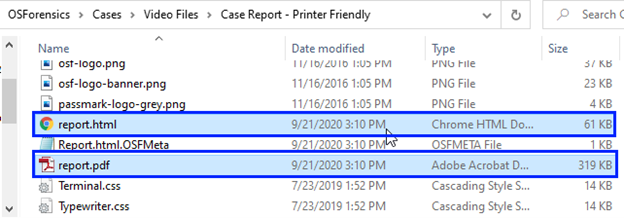
Generating the OSForensics Case Report
OSForensics offers users several styles and formats of case reports to accommodate different types of cases. The typical OSForensics case report consists of our automated scan results such as from the User Activity, System Information, Passwords and other similar modules, as well as files and artifacts selected for inclusion by the user. Generating the report is fairly simple process but offers lots of options to include or exclude certain information based on your individual preferences. The report generator can be accessed from within the Manage Case module and by clicking on the ‘Generate Report’ button.

This will then launch the window for the report generator as shown below.
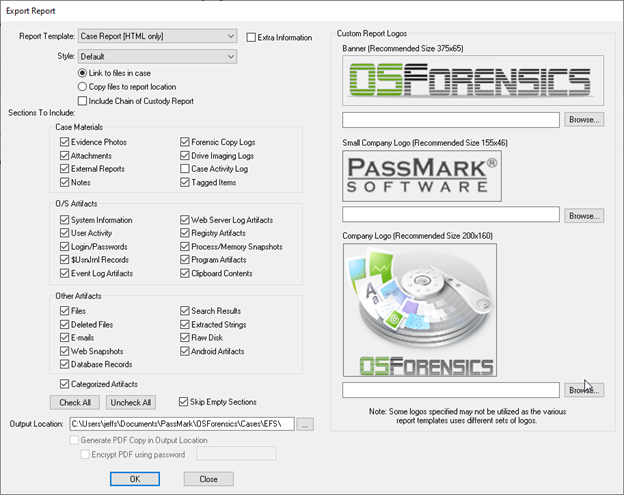
The first option you see is the Report Template options.

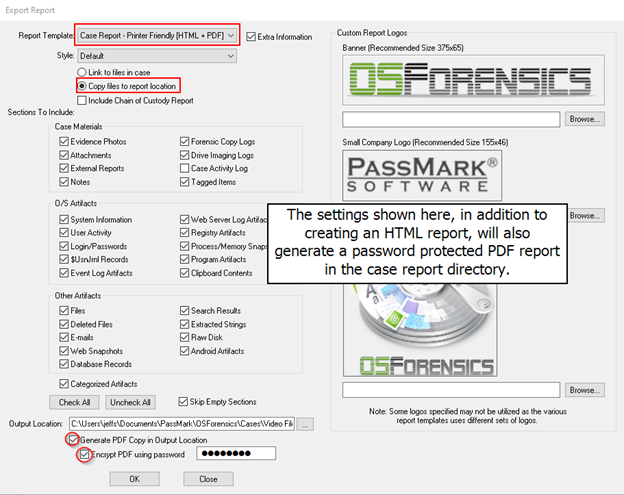
Users can choose from 5 options for the report they wish to generate. Three options are related to the main case report, with the 4th and 5th options being a Chain of Custody report and a Case Log report. You will also notice the ‘Extra Information’ checkbox next to the template options. Checking this box will include additional metadata columns for included files. Leaving this unchecked, the report will contain basic metadata about the included files.
The next option below templates is the ‘Style’ options. Most users will opt for the default style, but you do have 4 total options. For example, if you wanted a ‘terminal’ style look to your report, you could choose the ‘Terminal’ option which would make your report look like the image below.

Next, you have the options to either ‘Link Files to the Case’ or ‘Copy Files to the Report Location’. This can confuse some users. The easiest way to think about these options is to decide whether or not you want the files you marked for inclusion in your report, to be able to be accessed and viewed from the report if the report was burned to a DVD or transferred to a USB or some external device. Many times, the final reports will be submitted to a client, a supervisor, an attorney, etc. If the ‘Copy Files to the Report Location’ radio button is enabled, then the files which you’ve attached to your case, will be available to the report viewer regardless of what computer they are viewing the report on. If you select ‘Link Files to the Case’, the case files will continue to be stored in the original OSForensics case file folder which is typically stored locally on your machine or a network location. When the report is generated, the files themselves that are referenced in the report are not included in the report container, and therefore if someone clicks on a referenced file in the report, the file(s) would not open. This is an easy to way users can create a “redacted” type of report, in cases where you may be dealing with files of a sensitive or illegal nature.

Adding Files and Important Artifacts to Your Report
OSForensics allows users the ability to add a wide range of items to their case. From traditional files or file lists, to 3rd party reports, pictures of evidence, chain of custody information, the OSF case log, and more. There is also the ability to “tag” files during your examination for further analysis at a later time. Tagged files can also be added to your case report as well.
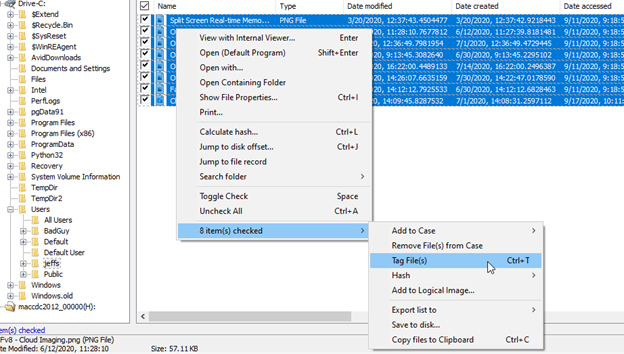
As shown in the screenshot above, simply checkmark a file or selection of files, and through right-click options, choose ‘Tag File(s)’ or you can also use the keyboard shortcut Ctrl+T.
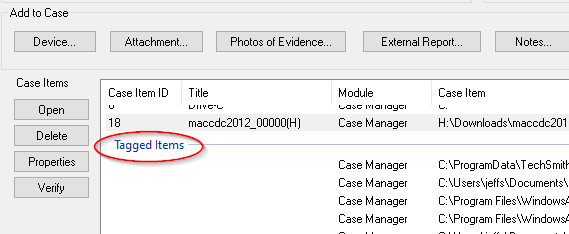
You can review Tagged Files in the ‘Manage Case’ module under the section labeled ‘Tagged Files’ as shown below.
To add a file or files to your case, follow the same procedures for tagging files, but choose the ‘Add to Case’ option and then select either ‘File(s)’ or ‘List of Checked Items’ if you only wish to document the list of files and not the files themselves.

Like tagged files, devices and other data, all files that you add to your case can be found at anytime in the ‘Manage Case’ module, under the ‘Files’ section as shown below.

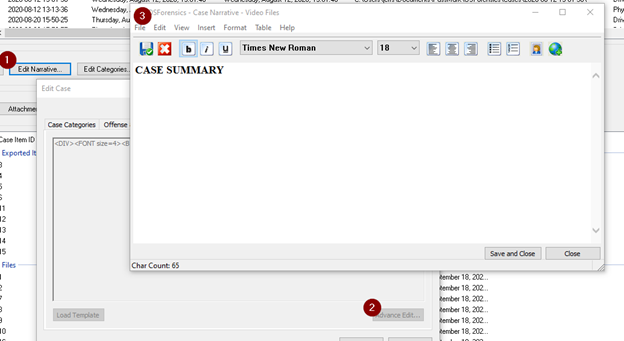
Another benefit of using OSForensics to create your entire case report, is the ability to write your full narrative section within the tool. After a case has been created, a user simply needs to click the ‘Edit Narrative’ button in the ‘Manage Case’ module. After this, click the ‘Advanced Edit’ button to access the Editor. See below.
Oftentimes, forensic examiners will utilize multiple forensic tools in the same case. OSForensics allows a simple, automated method of adding these 3rd party vendor reports within the OSForensics report. Simply click the ‘External Report’ button. Next, point to the appropriate HTML or PDF file in the case report directory of your 3rd party tool’s report. For HTML reports, ensure that you checkmark the ‘Copy entire report folder’ option so that the report and included files will operate as expected when viewed.
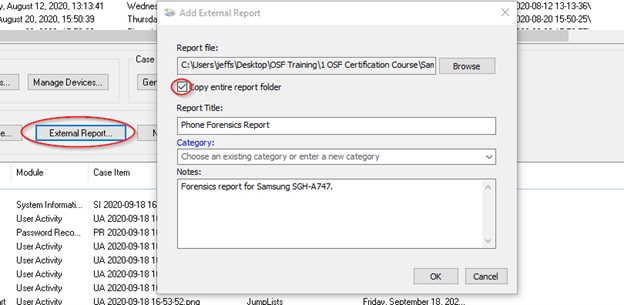
You can add other attachments, photos of evidence, case notes, and even add Clipboard data to your case.

Another important and useful element to adding files and artifacts of interest to your case with OSForensics is a labeling system we call ‘Categories’. When you add files and artifacts to your case, you’ll notice that in addition to a name and description, you can also assign the file or files a preset category or create a new category on the fly.
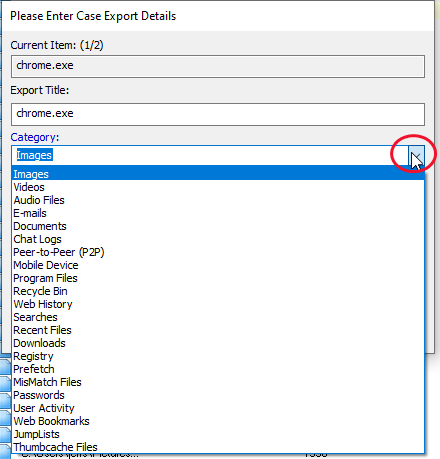
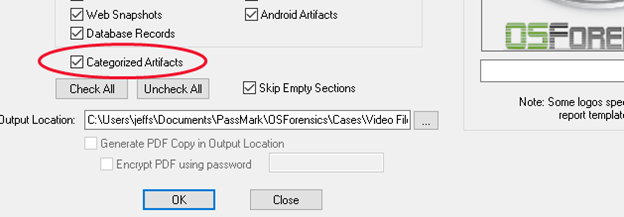
When you generate your final case report within OSForensics you will see an option to include or exclude a ‘Categories’ section. So, for users who do not take advantage of this labeling system, they will want to uncheck this option in the case generator. For those who do utilize this feature, this is a great way to categorize case data into easy to find sections for quick access to certain types of files or evidence.
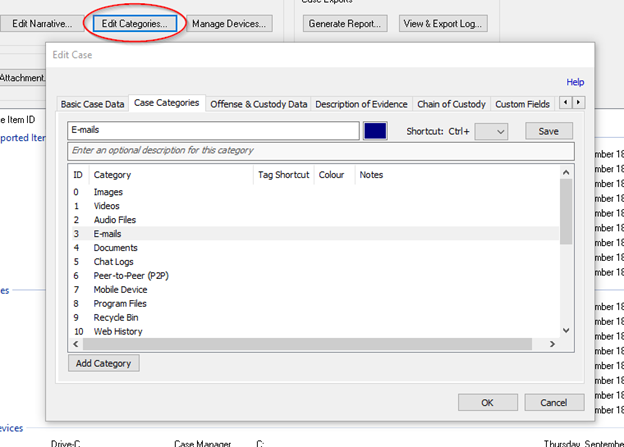
You can edit and even assign keyboard shortcuts and color-coding to the categories from the ‘Case Categories’ tab after clicking on the ‘Edit Categories’ button.
When you have completed your analysis and have added all evidentiary files and information to your report, you will need to generate your report. These can be HTML or PDF reports. You can even choose a password protected PDF if access control is necessary.
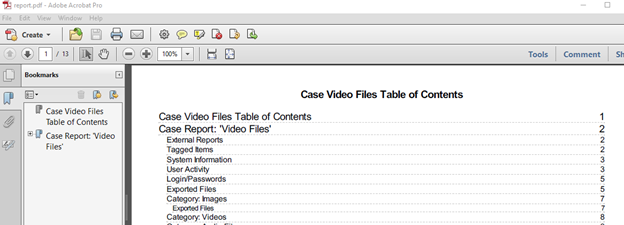
Once a report has been generated, the report will typically open automatically. PDF reports will also contain a Table of Contents.
HTML reports will open in the default system browser. Typically, the default report directory will be in the Cases folder. Here is a typical HTML case report path… file:///C:/Users/
Files that were included in the report will by hyperlinked in the HTML report and can be opened when you click on them.

After closing the case report, you can re-open the report by simply returning to the ‘Manage Case’ module in OSForensics and locating the report in the ‘Reports’ category.

Distributing the Report
Most users will need to distribute their OSForensics report to a client, attorney, boss, security team member, etc. To distribute an HTML or PDF report, you will need to copy the case report directory to a media device such as a DVD or USB storage device.
Simply locate and Copy the case report.
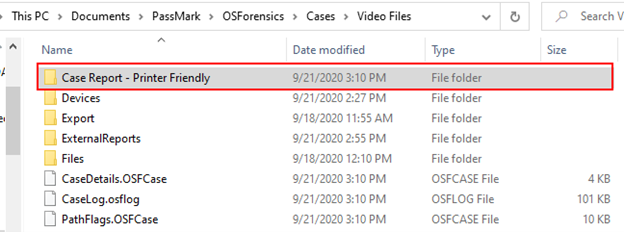
Then Paste the case report to the media device of your choice. Once distributed, others can view the report by opening this case report folder and navigating to either the Report.pdf or Report.html file and double-clicking it.
