Booting a forensics image on a Virtual Machine
Starting with V7 of OSForensics, booting a forensic image of a system disk as a virtual machine has never been easier. Previously, this process was typically conducted using various 3rd party Linux tools and required many cumbersome steps. This ‘manual’ way also required the user to convert their forensic image to a RAW image format if it happened to be in a more popular image format such as .E01 for example.
When performing forensic investigation on an image of a target system drive, it is often necessary to recreate and examine the live environment of the system to acquire all relevant data during the investigation. By running the image as a live system, the investigator can perform a live forensic analysis of the image, allowing for the potential discovery of additional forensic artifacts that may not have been previously uncovered from a traditional static analysis. Finally, because the system is running in a protected virtual environment created from the forensic image file, there is no risk of compromising the target system.
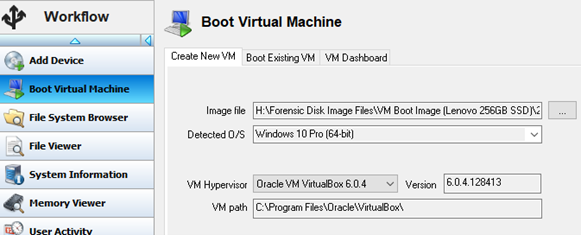
Advantages of using OSForensics for this method of analysis include:
- Fully automated, 1-click type of operation.
- No 3rd party Image Mounting software to purchase. (OSFMount is included and works automatically in background)
- Supports Windows, Mac and some Linux builds. (Windows XP to Windows 10 & Mac OSX 10.13 and above)
- Supports VirtualBox and VM Workstation hypervisors.
- Supports various image file formats.
- All disk writes within the VM are stored in a separate delta write cache file, preserving the integrity of the disk image file.
- Option to restore the disk state from a previous boot using the disk image's delta file. Otherwise, the original disk image is used, and a new delta created.
- Option to disable automatic disk checkup on boot due to a ‘dirty’ file system. This can occur if the disk image was acquired before the system was properly shutdown or after an improper shutdown.
- Boot into the target user account WITHOUT knowing the Windows user account with our Password Bypass feature that supports most Windows Operating Systems.
- Supports attaching additional disk images as well. Useful when target systems have multiple internal or attached disks.
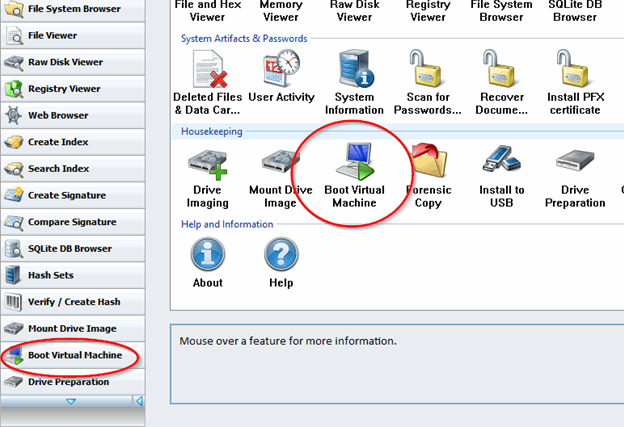
To access this feature from the Start screen, simply click the Boot Virtual Machine icon or module button as shown above.
Users simply need to point OSF to the forensic image file of the target O/S drive, review a few other options and features and click the ‘Boot VM’ button.
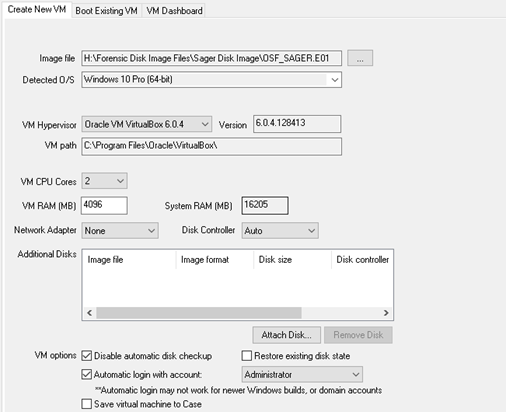
Steps
- 1. Select image file.
- 2. Choose OS if image is of a multi-boot system.
- 3. Choose VirtualBox or VM Workstation. (Must be pre-installed)
- 4. Review technical specifications.
- 5. Attach any additional disk images.
- 6. Choose or review VM options and User account to boot.
- 7. Click “Boot VM”
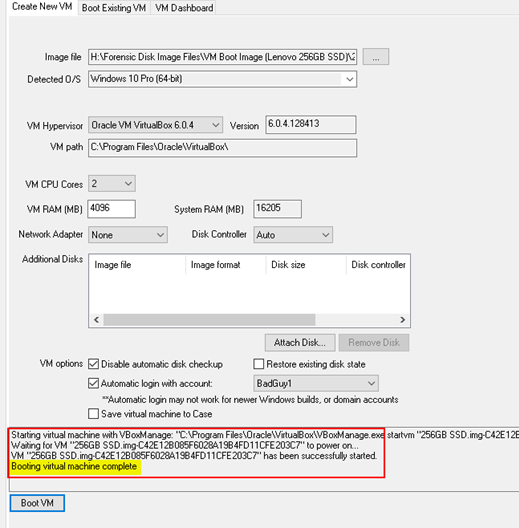
After clicking ‘Boot VM’, the real-time log with begin recording all of the processes taking place behind the scenes. Once completed, your VM software will launch and the selected user account will boot…
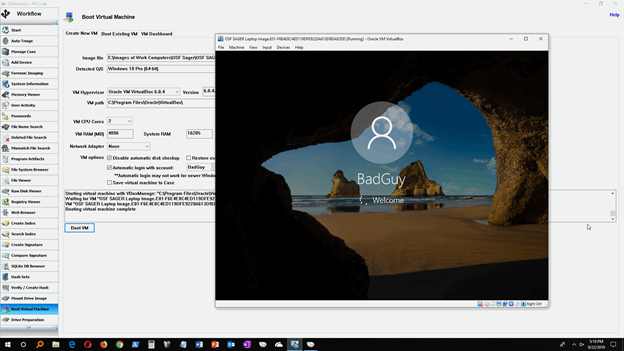
Analyzing the Live System
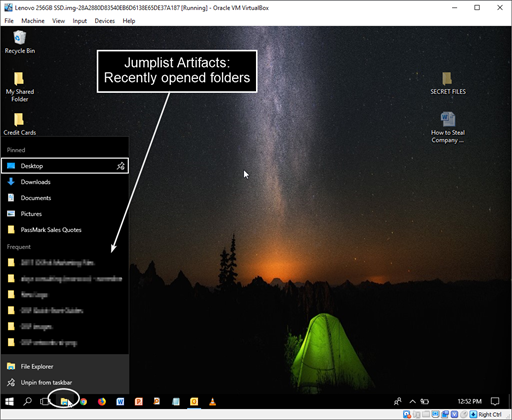
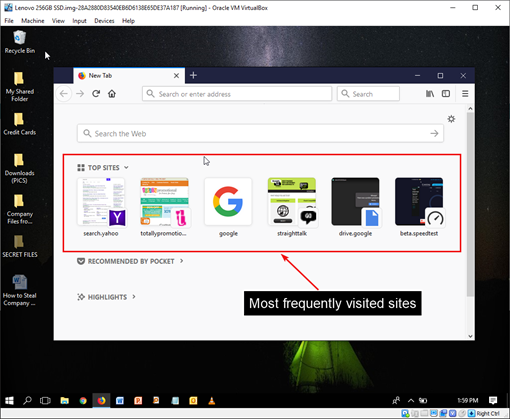
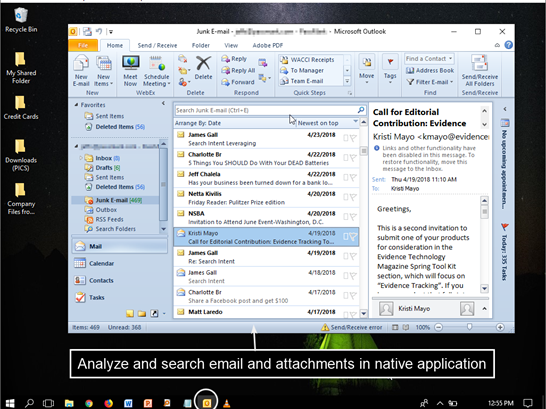
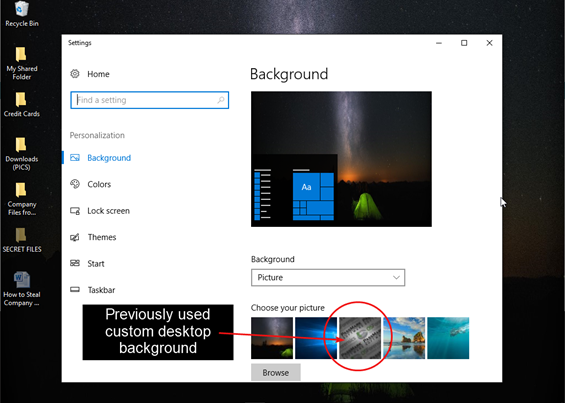
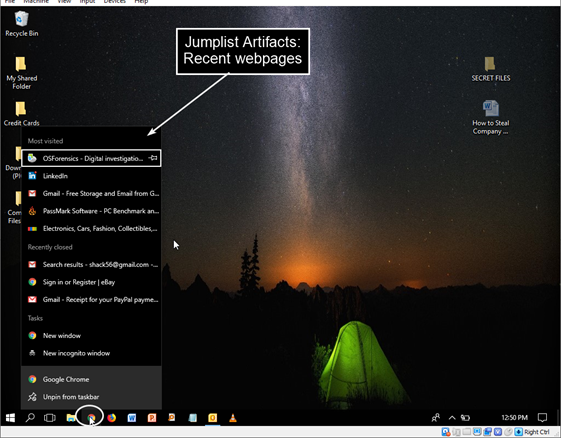
Once the boot process is complete, you may begin analyzing and searching through the live system. In addition to being able to review the Desktop layout, the Recycle Bin, and proprietary files in their native application, this also provides a great visual aid for screenshotting evidence to present to a client or in court when necessary.
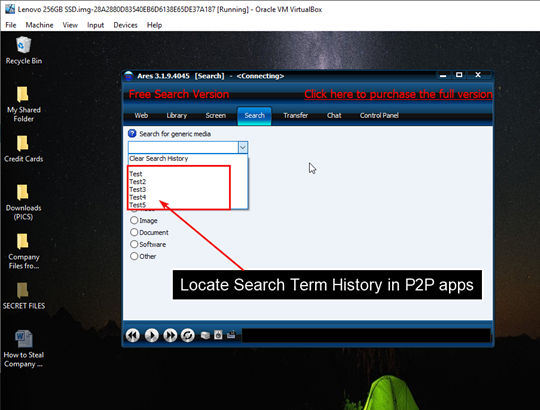
Screenshots allow you to capture evidence files and artifacts just as they may have appeared through the eyes of the user. Some examples include…
- Jumplists (recent webpages, Word docs, etc.)
- Autorun Apps.
- Email in its native application (e.g., Outlook)
- Recycle Bin contents (original names/location)
- Previous custom desktop backgrounds
- Settings for certain applications (e.g., CCleaner)
- Search term history from P2P and other applications
For a tutorial on how to create a Virtual Machine from a Forensic Disk Image, please see the below video.
| Forensic Image Virtual Boot:Learn how to create a Virtual Machine from a Forensic Disk Image. Download (Right-click to download, MP4 format, 130MB) |
Copyright © 2024 PassMark™ Software


